The Positions tab of Burp Suite Intruder has a dropdown menu for selecting the attack type. Intruder offers four attack types, each serving a specific purpose. Let’s explore each of them:
- Sniper: The Sniper attack type is the default and most commonly used option. It cycles through the payloads, inserting one payload at a time into each position defined in the request. Sniper attacks iterate through all the payloads in a linear fashion, allowing for precise and focused testing.
- Battering ram: The Battering ram attack type differs from Sniper in that it sends all payloads simultaneously, each payload inserted into its respective position. This attack type is useful when testing for race conditions or when payloads need to be sent concurrently.
- Pitchfork: The Pitchfork attack type enables the simultaneous testing of multiple positions with different payloads. It allows the tester to define multiple payload sets, each associated with a specific position in the request. Pitchfork attacks are effective when there are distinct parameters that need separate testing.
- Cluster bomb: The Cluster bomb attack type combines the Sniper and Pitchfork approaches. It performs a Sniper-like attack on each position but simultaneously tests all payloads from each set. This attack type is useful when multiple positions have different payloads, and we want to test them all together.
Each attack type has its advantages and is suitable for different testing scenarios. Understanding their differences helps us select the appropriate attack type based on the testing objectives.
When using Burp Suite Intruder to perform an attack, the first step is to examine the positions within the request where we want to insert our payloads. These positions inform Intruder about the locations where our payloads will be introduced (as we will explore in upcoming tasks).
Let’s navigate to the Positions tab:
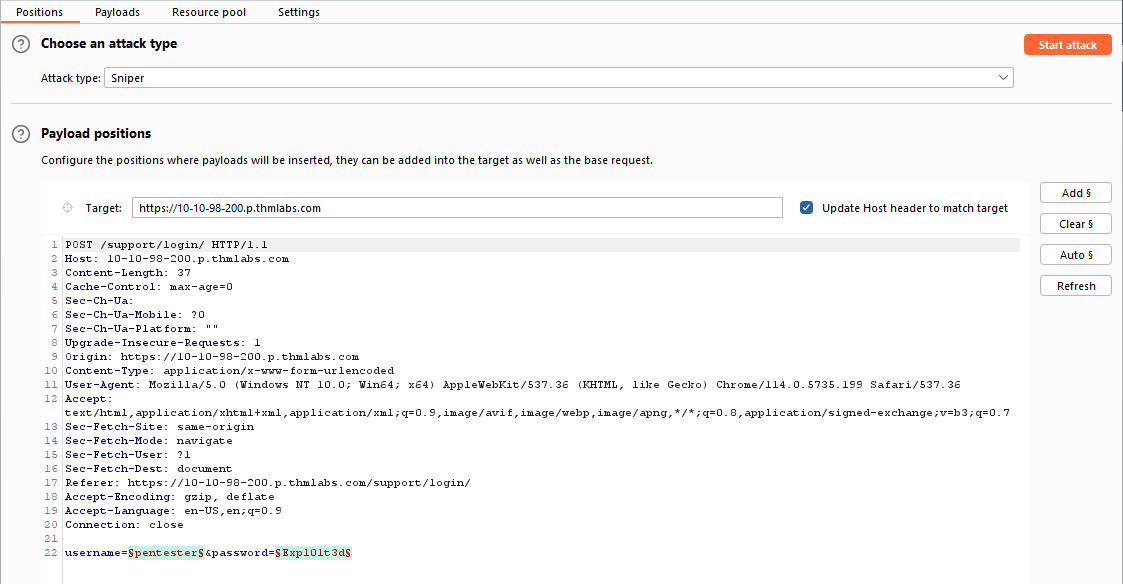
Notice that Burp Suite automatically attempts to identify the most probable positions where payloads can be inserted. These positions are highlighted in green and enclosed by section marks (§).
On the right-hand side of the interface, we find the following buttons: Add §, Clear §, and Auto §:
- The
Add §button allows us to define new positions manually by highlighting them within the request editor and then clicking the button. - The
Clear §button removes all defined positions, providing a blank canvas where we can define our own positions. - The
Auto §button automatically attempts to identify the most likely positions based on the request. This feature is helpful if we previously cleared the default positions and want them back.
The following GIF demonstrates the process of adding, clearing, and automatically reselecting positions:
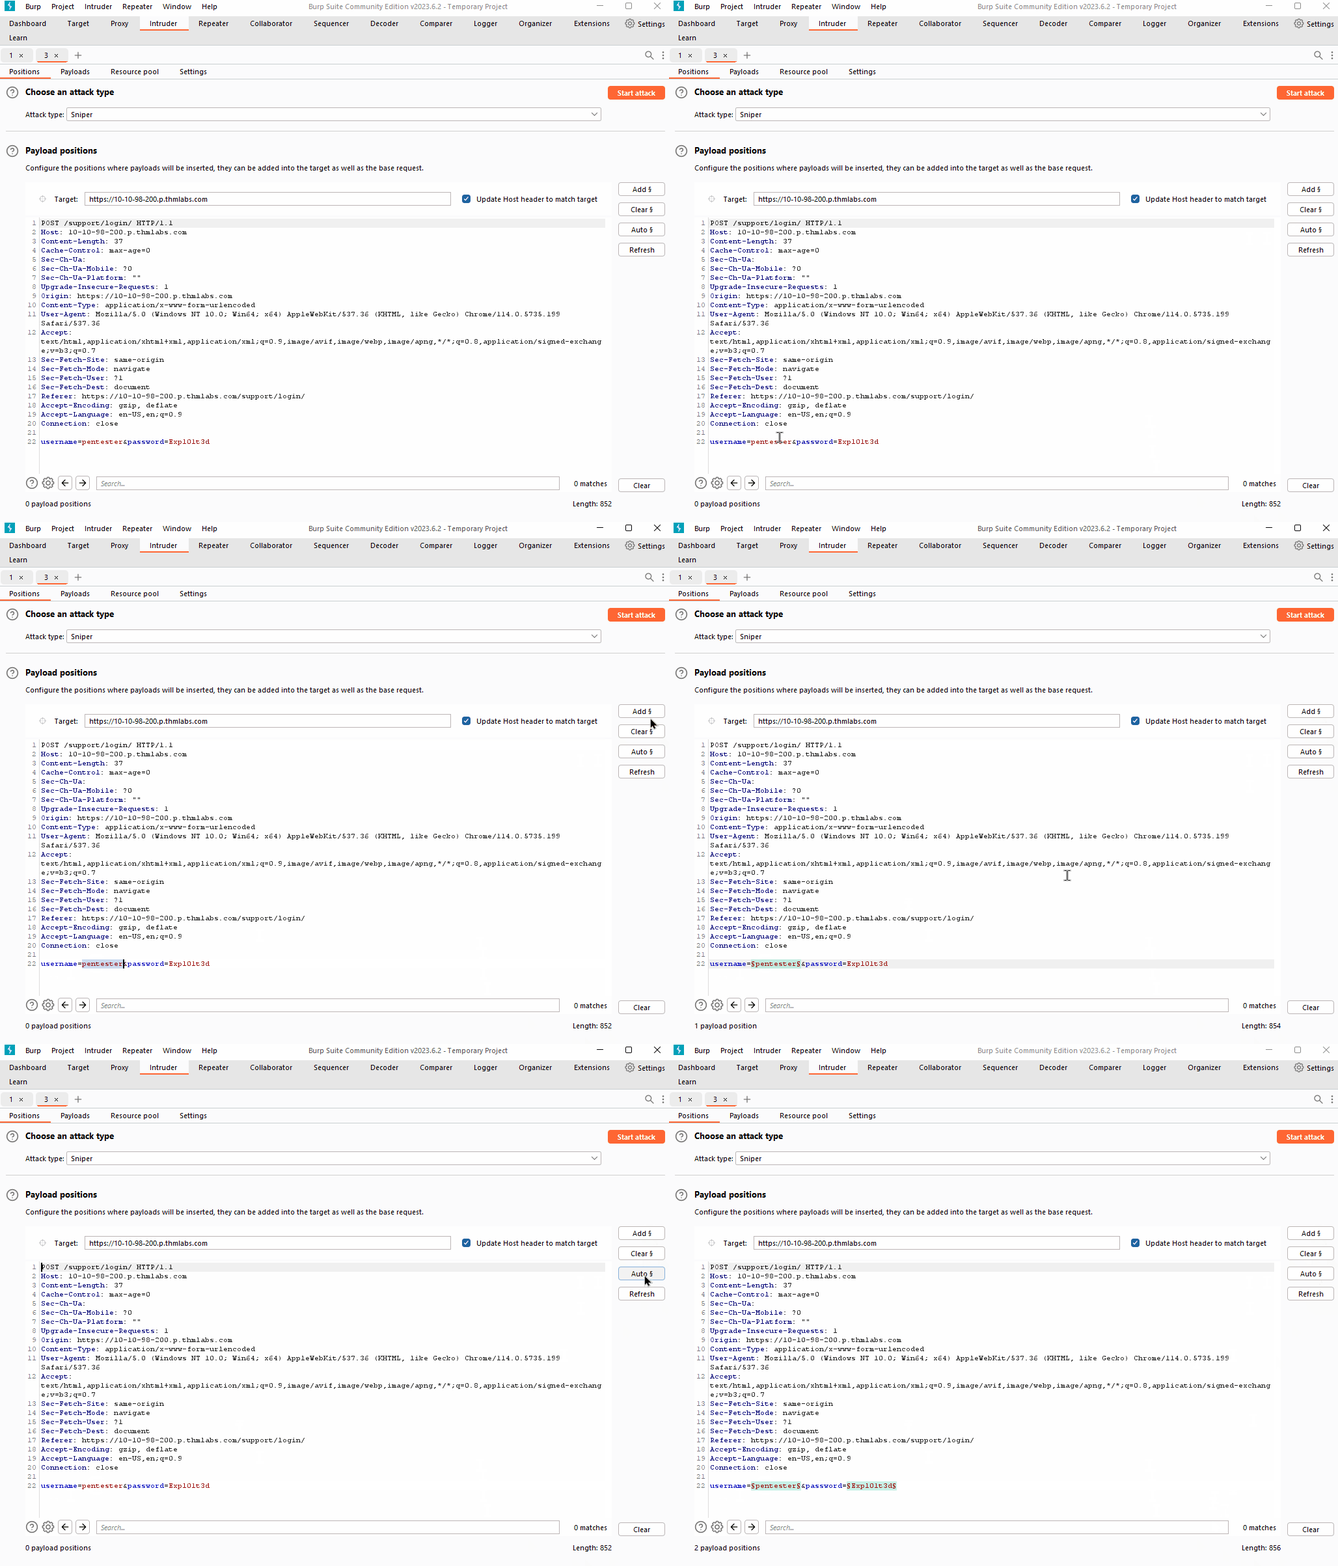
Take some time to familiarize yourself with adding, clearing, and auto-selecting positions using the Burp Suite Intruder interface.
In the Payloads tab of Burp Suite Intruder, we can create, assign, and configure payloads for our attack. This sub-tab is divided into four sections:
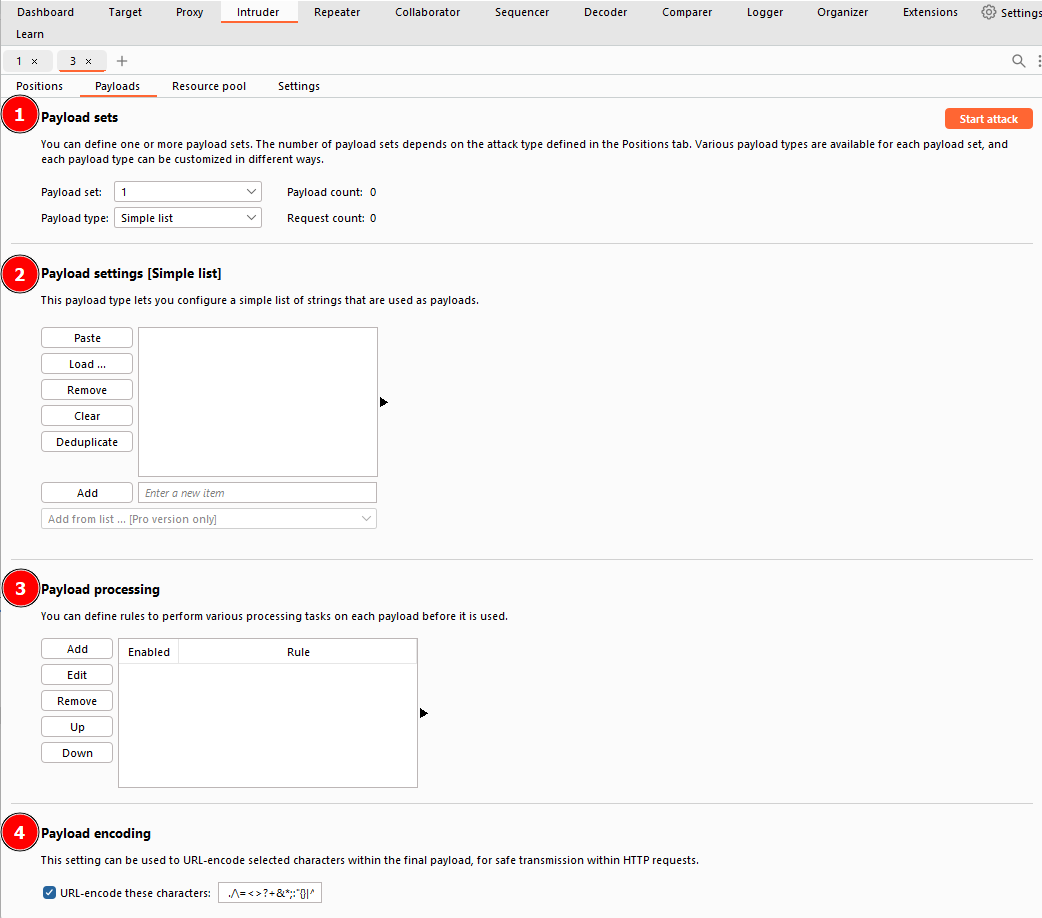
- Payload Sets:
- This section allows us to choose the position for which we want to configure a payload set and select the type of payload we want to use.
- When using attack types that allow only a single payload set (Sniper or Battering Ram), the “Payload Set” dropdown will have only one option, regardless of the number of defined positions.
- If we use attack types that require multiple payload sets (Pitchfork or Cluster Bomb), there will be one item in the dropdown for each position.
- Note: When assigning numbers in the “Payload Set” dropdown for multiple positions, follow a top-to-bottom, left-to-right order. For example, with two positions (
username=§pentester§&password=§Expl01ted§), the first item in the payload set dropdown would refer to the username field, and the second item would refer to the password field.
- Payload settings:
- This section provides options specific to the selected payload type for the current payload set.
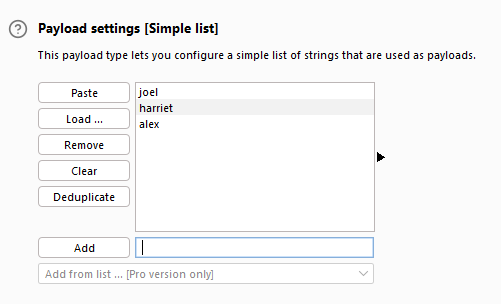
- For example, when using the “Simple list” payload type, we can manually add or remove payloads to/from the set using the Add text box, Paste lines, or Loadpayloads from a file. The Remove button removes the currently selected line, and the Clear button clears the entire list. Be cautious with loading huge lists, as it may cause Burp to crash.
- Each payload type will have its own set of options and functionality. Explore the options available to understand the range of possibilities.
- Payload Processing:
- In this section, we can define rules to be applied to each payload in the set before it is sent to the target.
- For example, we can capitalize every word, skip payloads that match a regex pattern, or apply other transformations or filtering.
- While you may not use this section frequently, it can be highly valuable when specific payload processing is required for your attack.
- Payload Encoding:
- The section allows us to customize the encoding options for our payloads.
- By default, Burp Suite applies URL encoding to ensure the safe transmission of payloads. However, there may be cases where we want to adjust the encoding behavior.
- We can override the default URL encoding options by modifying the list of characters to be encoded or unchecking the “URL-encode these characters” checkbox.
By leveraging these sections, we can create and customise payload sets to suit the specific requirements of our attacks. This level of control allows us to finely tune our payloads for effective testing and exploitation.